Pc circuits
Viewed products
-

Automatic Pc power on
This circuit is used for switching a...
Automatic Pc power on
This circuit is used for switching a computer or any other device which start operating by a click, after a blackout (when power is restored).
Data sheet
| Design | Schema and circuit |
| View | No display |
| Supply voltage | 5 Volts |
| Electronic | Digital |
| Photo | Yes |
More info
For example, we have a programmed task on the computer, we are downloading on a P2P network, or we have a domestic server which must be always running. Obviously, in each of these cases, the task must be programmed to be executed at first, as if the computer were being switch on again, except that in this case our circuit will click on when power is restored.
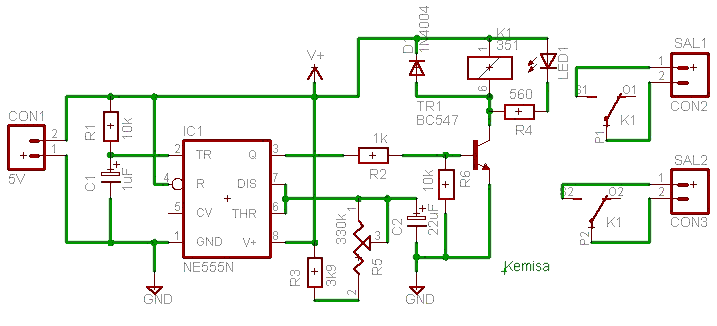
The circuit is very simple. It is a timer that activates a relay as soon as the circuit is turned on. It will turn off the relay afterwards.
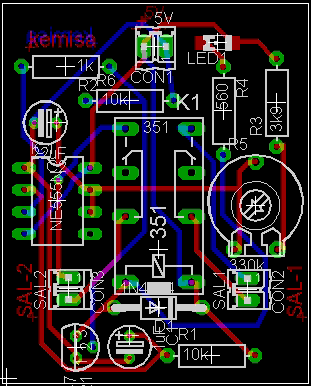
Time for delay to operate this switching on can be programmed when setting the R5. When electricity is on, the computer the source of supply of your computer powers on our circuit and the basic plate at the same time.
Given that in our circuit there is a locked relay, this one works as if we were pressing the on button to have the computer running.
A few seconds later our relay is disconnected and doing so we “loosen” the switch button. The 5 volts powered circuit can be obtained directly from the computer power supply or from a 5 volts power supply.
If we choose to feed the circuit with the computer power source, like in our given example, we´ll have to remove two cables from the 9-pin plugs and any of ... 3,5,7,13,15,16,17 (the negative), these pins correspond to the black wires.
First of all, with the computer off, we recommend to gauge with a multimeter where in the ATX connection pins of our power supply, remains the tension of 5 volts which supplies the basic plate when the computer is off. From there we will get our 5 volts to power the circuit.
We will first turn on the power supply and find from where do the wires come out, violet and black.
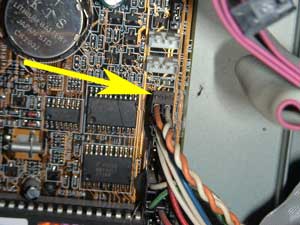
The pointers mark the location of the violet and black wires.
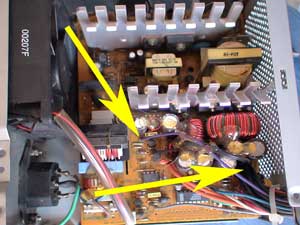
Now we watch carefully at the location in order to solder the wires on the side of the tracks. The picture of our power supply shows where the wires on the side of the tracks come out.
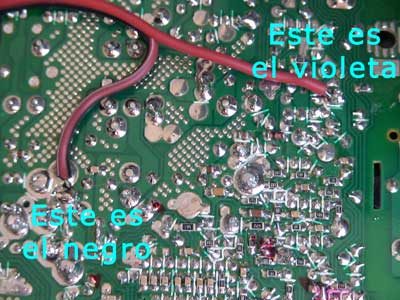
The connection of the relay output, S1 or S2, should be made in parallel with the computer power button. We can also remove the on-off switch and have our circuit connected with the circuit board pins which turn on the computer.
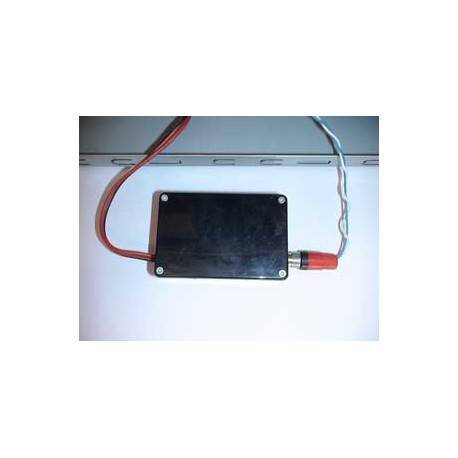
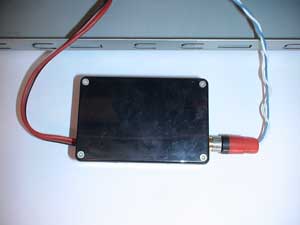
A picture of our circuit. We put it in a small plastic sleeve.
The wiring diagram.
The circuit board.
